
"I Do That!"
I'm a huge fan of The Adventure Zone, and so is my son. I'm also a fan of prop building, and can be a little impulsive sometimes. Like that time I was listening to Adventure Zone and decided I wanted to make a Bureau of Balance bracer, because reasons.
I started with a really simple model in Fusion360. I designed the emblem flat so it could print with the most strength and need no support material then be thermoformed into it's final shape. After a minimal amount of cleanup I dunked it in boiling water for about 10 seconds and draped it over a jar I had handy, it cooled with a perfect curve. Then I body shopped it with multiple coats of filler primer and lots of sanding. Then I abused it with a Dremel a bit to add some wear and tear as well as the background texture. The paint started with a Rustoleum oil rubbed bronze metallic color, followed by some oil paint weathering and finally some rub-n-buff to add some metallic sheen and highlights.

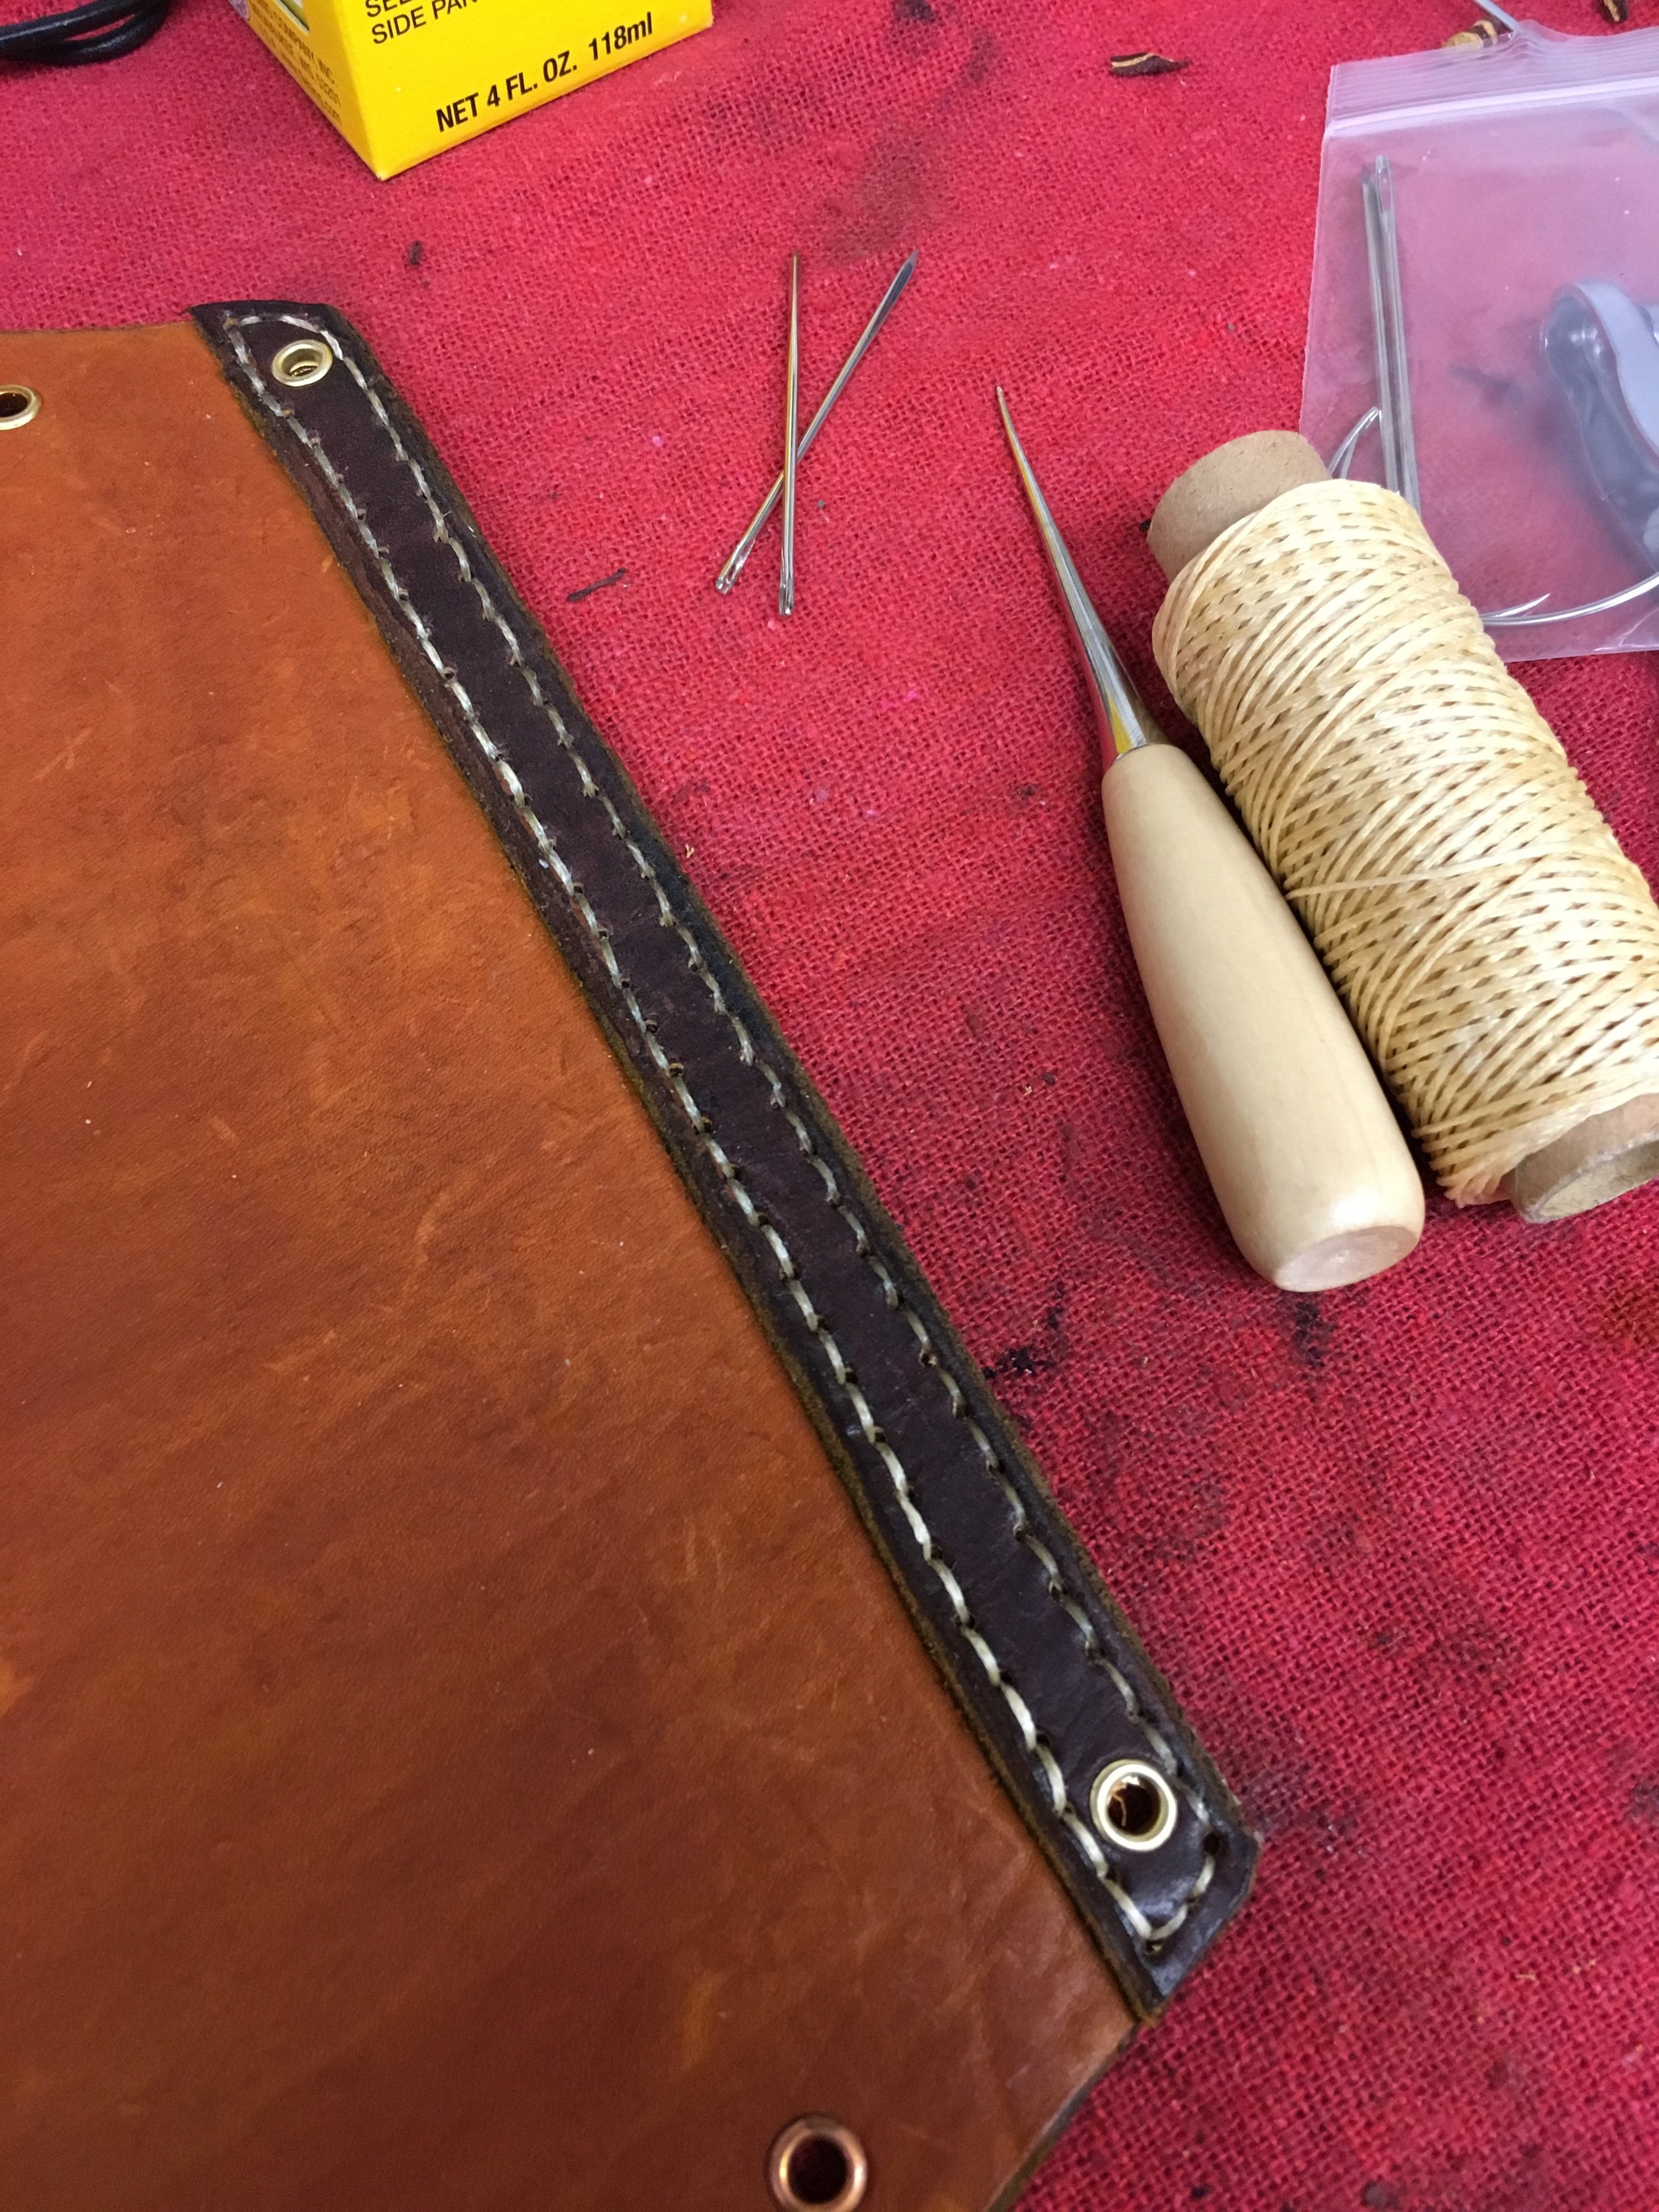
I picked up a bag of scrap leather from Micheal's and set about fumbling through making the bracer. It's amazing what you can learn (or think you've learned) from YouTube. I quickly found myself going down the leather working rabbit hole and ended up with a few orders of cool stuff from Amazon. I started with a simple paper pattern, I just wrapped my arm with paper, taped it and drew the rough shape I was after. After cleaning it up I folded it in half to trim it so it was symmetrical. I then traced the shape on the back of the leather and cut out the pieces. Then I measured in from the edges the trip pieces and cut those out of the pattern and transferred those to some thinner leather. After trimming the edges and grooving it with the nifty new tools I bought I dyed the leather and wet formed it get a rough cylinder, and beat it up a little. I added some small grommets which were pretty simple. Just punch a hole, push in the grommet, line it up on the form that came with it and using the stamp smashed it with a hammer.
Next I punched all the holes with a four hole punch and a hardwood cutting board (this made my downstairs neighbors at the beauty salon super happy I'm sure) and set about stitching the pieces together. Stitching leather is a chore, but so satisfying.

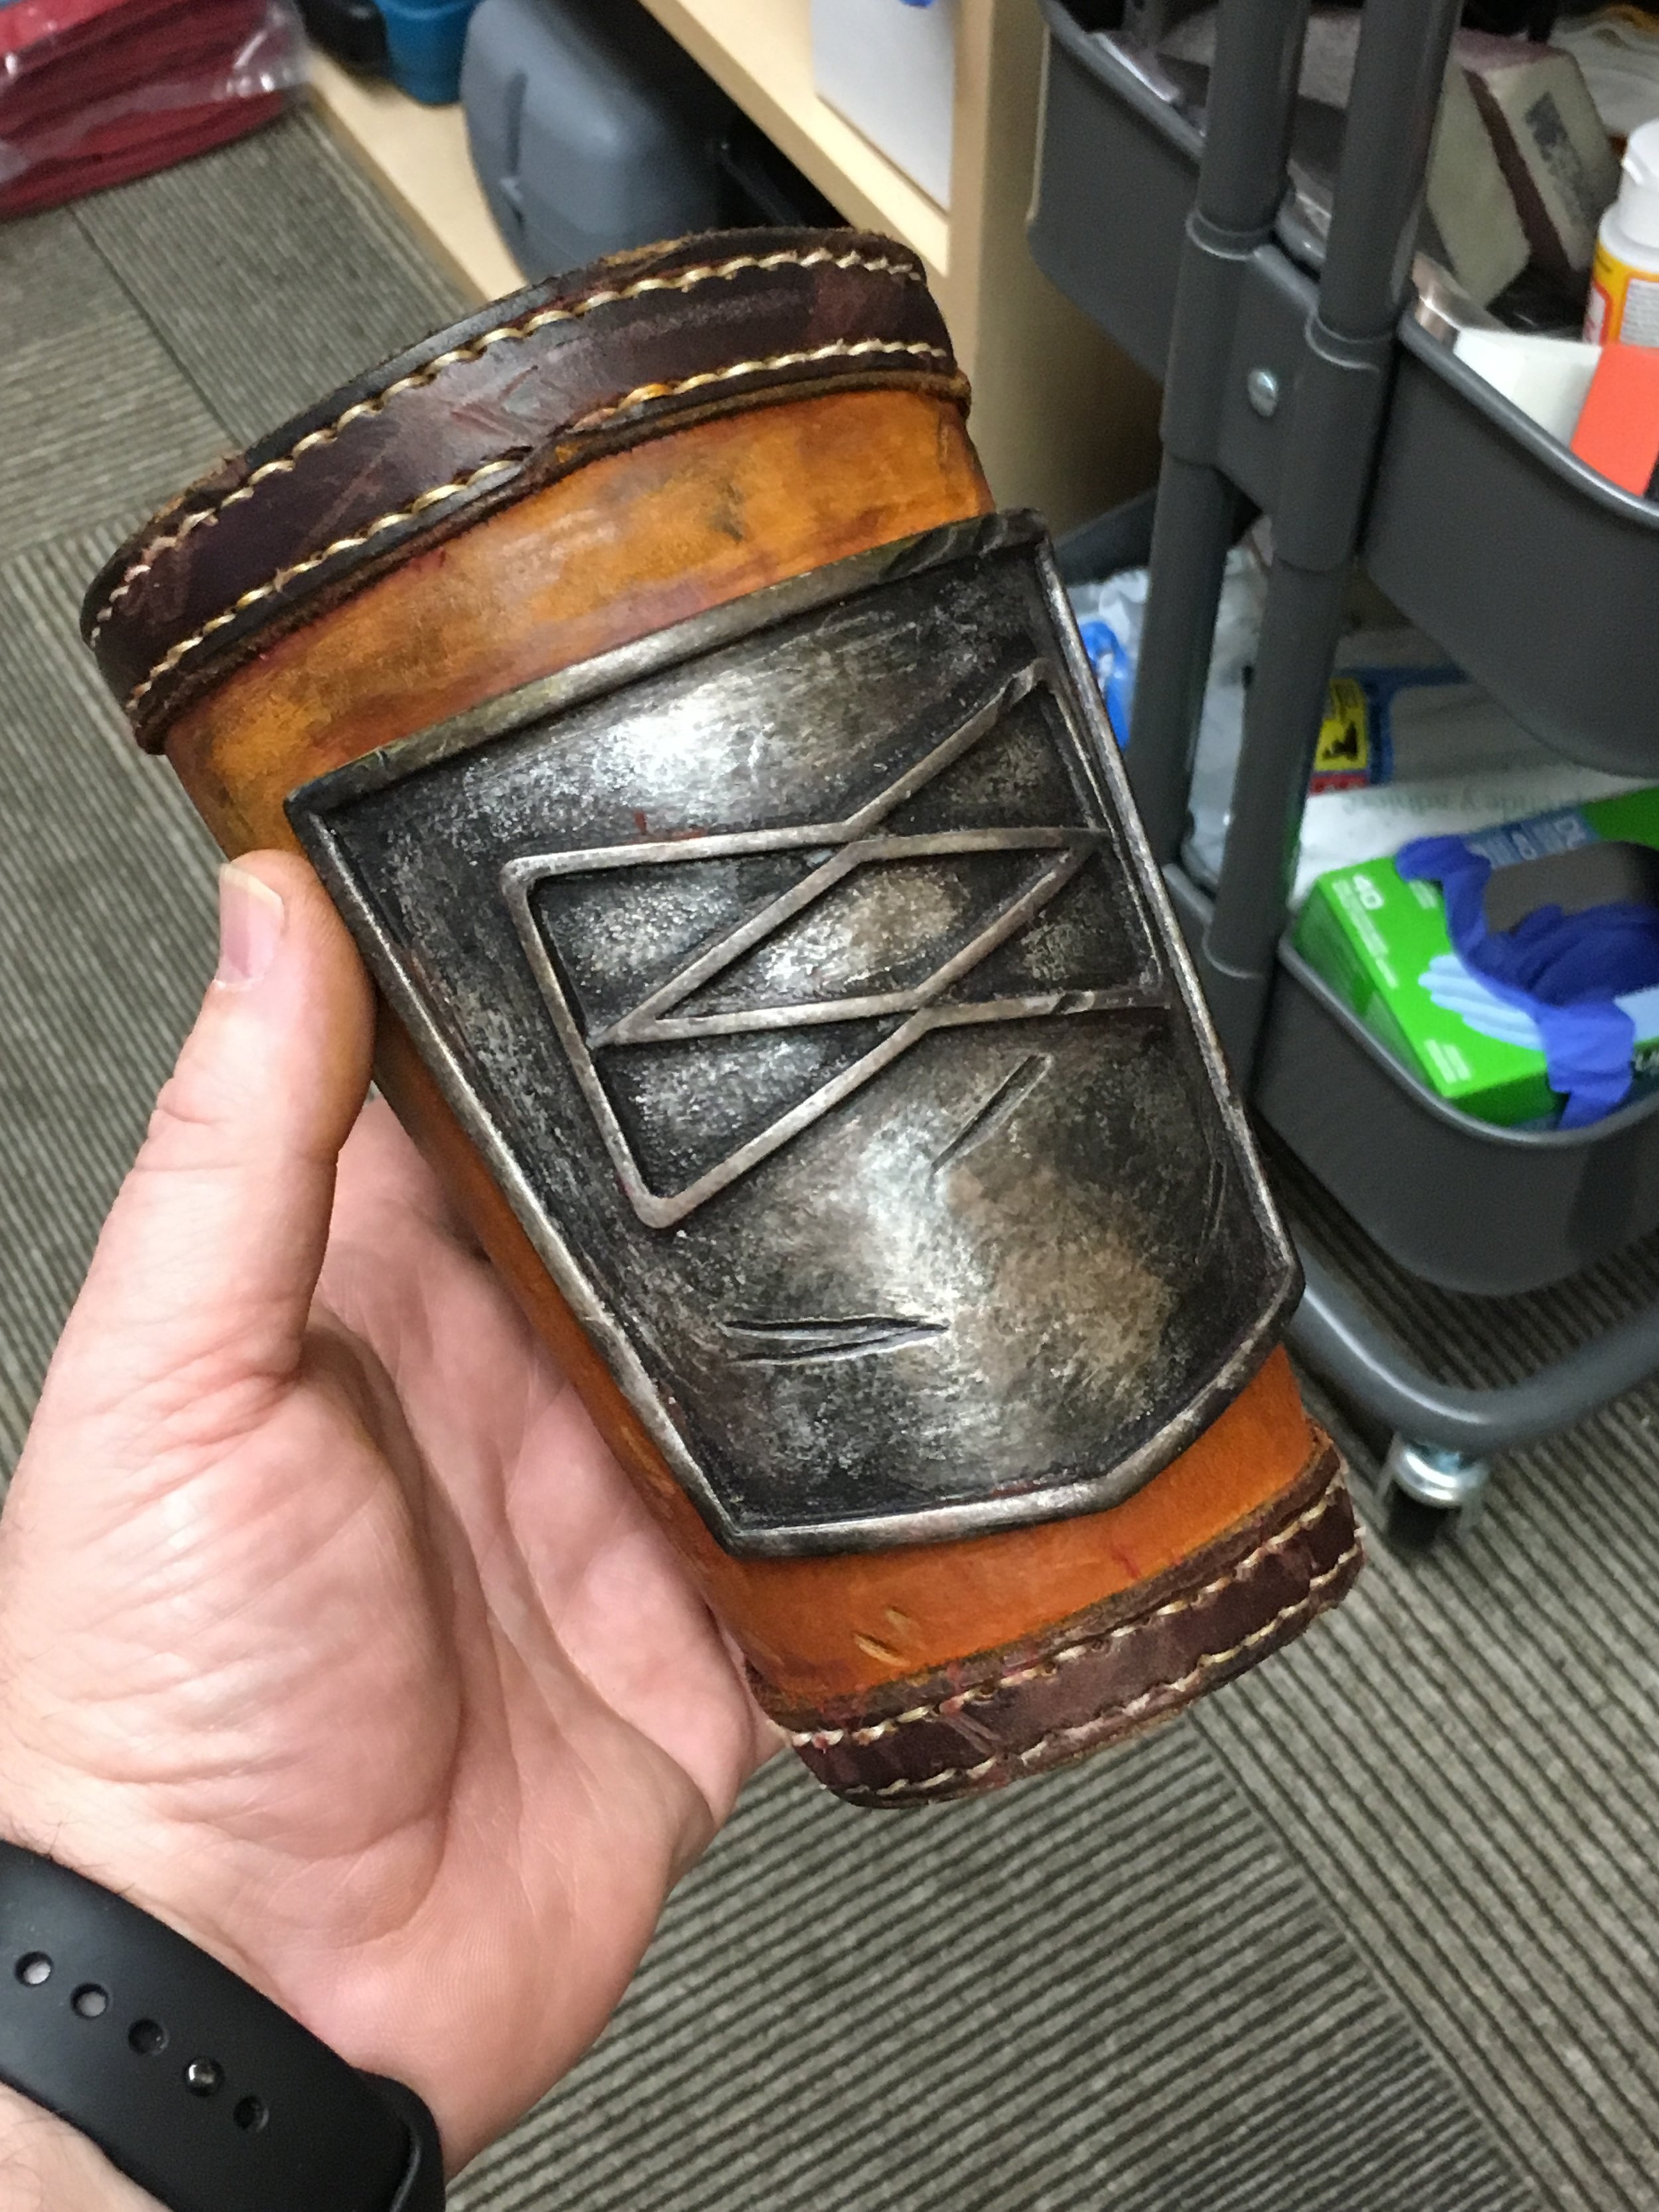
Then using some good old E6000 I adhered the BoB emblem to the bracer and let it dry overnight. Then out came the Dremel again (the poor props suffer so greatly at our hands) and more damage and weathering. I wanted this thing to look like it had seen some action.


Then I broke out the oil paints again and added some more weathering. You have to be careful with the paints on leather, you just smudge in a bunch of black and expect it to mostly rub off and you're going to be really disappointed. Test it on a snap first to get the hang of it.
The last step was to add some leather lashing (shoestrings) which of course also had to be roughed up a bit as well. I started with a dunk in warm water, then furiously rubbed them together and into a ball in my hand, I'm sure I looked insane at the time. Then to remove any doubt I took them out back, threw them on the ground and rubbed them around with my shoe (yup, insane). Then I tried several lacing patterns until I decided on this cross pattern, it looks just flashy enough,
I'm super happy with how it turned out, it looks (and smells) amazing, and I learned a ton about working with leather. My son is super happy with it too, I had planned to wait and give it to him for his birthday, but just got too excited. I have no self control, much like Magnus.